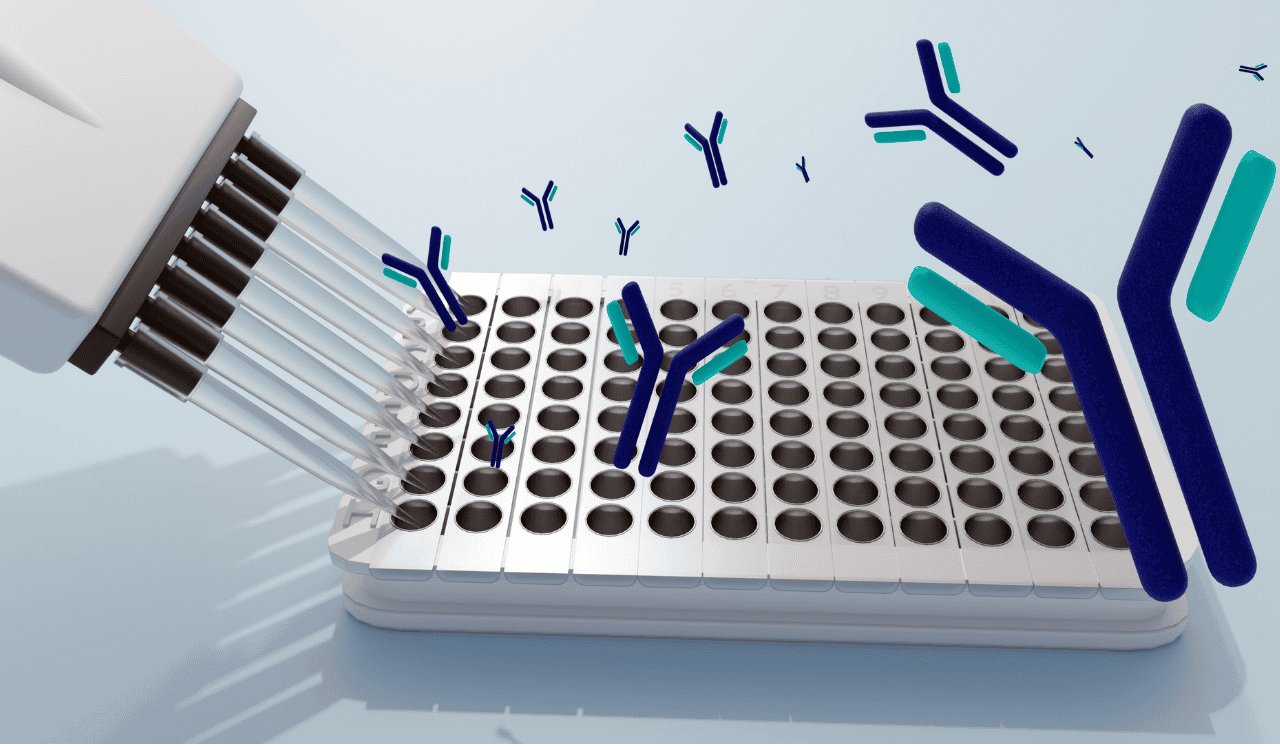
A Practical Guide to Clinical ELISA Kit Production
Getting a new diagnostic ELISA off the ground starts with a solid strategic foundation. It’s all about nailing the assay design and sourcing top-notch reagents. This isn’t just a simple protocol; you’re essentially turning a collection of biological parts into a reliable tool that can pinpoint specific biomarkers. I’ve seen too many projects stumble because this initial planning phase was rushed. Getting it right here is the single most critical factor in making sure your final kit is sensitive, specific, and—most importantly—reproducible.
Building a Robust Foundation for Your Diagnostic ELISA

elisa kit production
Before a single microplate gets coated, the fate of your ELISA kit is already being decided by the clarity of its design and the quality of its components. Think of this stage less as a checklist and more as a series of crucial decisions that will define the assay’s performance down the line. It’s a classic case of measure twice, cut once.
The very first question you have to answer is: what is this kit really for? An assay designed for broad population screening will have vastly different performance requirements than one meant for a precise clinical diagnosis or for tracking how a patient responds to therapy. This purpose statement guides every single choice you make from here on out.
Sourcing High-Quality Antigens and Antibodies
Let’s be honest: the heart and soul of any ELISA are its core reagents—the capture antibody, the detection antibody, and the target antigen. The quality here is completely non-negotiable. Sourcing inconsistent or poorly characterized reagents is the fastest way I know to build an unreliable kit.
Take a real-world example from my work in neurology. If you’re developing a kit to detect α-synuclein, a key biomarker for Parkinson’s disease, the choice between monoclonal and polyclonal antibodies is a big one.
- Monoclonal Antibodies are fantastic for their high specificity to a single epitope, which gives you excellent lot-to-lot consistency. The downside? That specificity can backfire if the target epitope is hidden or altered in patient samples.
- Polyclonal Antibodies recognize multiple epitopes on the same antigen. This can boost your signal robustness and capture efficiency, which is a huge help for complex proteins like TDP-43 in ALS diagnostics. The trade-off, of course, is the potential for batch-to-batch variability that you have to control for.
A smart strategy for tough targets is often to use a polyclonal antibody for capture to grab as much antigen as possible, then come in with a highly specific monoclonal for detection to make sure the signal is clean and accurate. Choosing the right reagents is a cornerstone of the kind of work we do in our biomarker discovery services.
A well-designed ELISA is like a finely tuned engine. Every component, from the coating buffer to the substrate, must work in harmony. A single low-quality part can cause the entire system to fail.
Key Reagent Selection Criteria for ELISA Kit Production
Choosing the right reagents goes beyond just monoclonal versus polyclonal. Every decision has a direct impact on the final performance of the assay. This table breaks down the key factors I always consider when sourcing the foundational components for a new diagnostic kit.
| Reagent Type | Key Considerations | Impact on Assay Performance | Example Application (Neurology) |
|---|---|---|---|
| Capture Antibody | – Affinity & Avidity: How tightly does it bind? – Specificity: Does it bind only the target? – Format: Monoclonal for consistency vs. Polyclonal for signal amplification. |
Determines assay sensitivity and potential for cross-reactivity. A low-affinity antibody leads to poor signal. | Using a high-avidity polyclonal antibody to capture heterogeneous forms of Tau protein from CSF. |
| Detection Antibody | – Specificity: Must recognize a distinct epitope from the capture Ab. – Conjugation: Is it directly conjugated (e.g., HRP) or biotinylated? – Purity: Free of unbound labels. |
Critical for specificity and signal-to-noise ratio. A poorly conjugated antibody can increase background. | A highly specific monoclonal antibody against phosphorylated Tau (pTau) to differentiate from total Tau. |
| Antigen/Standard | – Purity & Integrity: Is it full-length and properly folded? – Source: Recombinant vs. native protein. – Quantification: Accurately measured concentration. |
Defines the accuracy and reproducibility of the standard curve, which is the basis for all quantitation. | Using a highly purified, full-length recombinant α-synuclein protein to create a reliable standard curve. |
| Secondary Reagents | – Enzyme/Label: HRP, AP, fluorophore? – Substrate: TMB for colorimetric, ECL for chemiluminescent. – Compatibility: Must work with the detection antibody’s label. |
Directly impacts the dynamic range, sensitivity, and readout method of the final assay. | Employing an HRP-conjugated secondary antibody with a TMB substrate for a robust colorimetric readout. |
Ultimately, successful reagent selection is a balancing act. You have to weigh specificity, sensitivity, consistency, and cost to build an assay that meets its intended clinical or research purpose.
The Nitty-Gritty of Plates and Buffers
Beyond the big-ticket reagents, the seemingly minor details are often what separates a great assay from a mediocre one. The choice of microplate, for example, matters a great deal. High-bind plates are the go-to for passively adsorbing capture antibodies, but the specific polymer chemistry can really influence binding efficiency and background noise. It’s worth testing a few types.
Buffer formulation is another area where small changes have big effects. A simple wash buffer, usually PBS or TBS with 0.05% Tween-20, is absolutely essential for washing away non-specific binding to get a clean signal. The blocking buffer—whether it’s BSA, non-fat dry milk, or a fancy commercial mix—has to saturate any leftover binding sites on the plate without getting in the way of the actual assay.
The demand for these tools is booming for a reason. The global ELISA kits market was valued at $2.1 billion in 2023 and is on track to hit $3.8 billion by 2032, driven by the need for precise diagnostics. This incredible growth just underscores how important it is to get the production details right from the very beginning. Every decision, from sourcing reagents for neurology biomarkers like tau/pTau to picking the right wash buffer, directly shapes your clinical and commercial success.
Fine-Tuning Your Assay for Peak Performance
Once you’ve sourced your core components and laid out your basic strategy, the real artistry begins. This is the optimization phase—the methodical, data-driven process where you transform a functional assay into an exceptional diagnostic tool. Think of it less as following a rigid protocol and more like dialing in every single variable to find its perfect balance.
This process is absolutely critical. A poorly optimized assay is a recipe for high background noise, low sensitivity, and frustratingly inconsistent results. Nailing this ensures your kit performs reliably, not just in your lab but in the hands of the clinicians and researchers who depend on it.
Finding the Sweet Spot with Checkerboard Titrations
The first, and arguably most important, step is figuring out the ideal concentrations for your coating antigen (or capture antibody) and your detection antibody. You’re looking for the combination that delivers the highest signal-to-noise ratio: a powerful positive signal with almost no background. The classic, and still most effective, method for this is the checkerboard titration.
Imagine your 96-well plate as a chessboard. You’ll prepare serial dilutions of your coating antigen and apply them vertically down the columns. Then, you’ll do the same with your detection antibody, applying it horizontally across the rows.
- Coating Antigen: Start with a high concentration, maybe 10 µg/mL, and perform two-fold dilutions down each column.
- Detection Antibody: Do the same across the rows, starting with a high concentration like a 1:1000 dilution.
After running the assay, you’ll have a complete grid of results. This data lets you pinpoint the exact concentrations of both reagents that produce the maximum specific signal with the lowest background. This “sweet spot” becomes the standard concentration for your kit.
Dialing in Incubation Times and Temperatures
With your reagent concentrations locked in, it’s time to tackle incubation times and temperatures. These factors directly influence the kinetics of antigen-antibody binding, and even small tweaks can lead to significant improvements.
For instance, a quick incubation at 37°C might speed up the reaction, but it could also invite more non-specific binding. On the other hand, a longer incubation overnight at 4°C often yields a cleaner signal. This gives high-affinity specific binding more time to occur while minimizing those pesky low-affinity, non-specific interactions.
Pro Tip: Don’t just test one condition. I’ve found that running a matrix—like 1 hour at 37°C, 2 hours at room temperature, and overnight at 4°C—is the best way to uncover the optimal balance between speed and signal quality for any given assay.
Optimizing Buffers and Substrates
The supporting cast—blocking buffers, wash buffers, and substrates—plays a huge role in the final performance. Non-specific binding is the arch-nemesis of a clean ELISA, and your blocking buffer is the first line of defense. A standard 1-3% Bovine Serum Albumin (BSA) solution is a common starting point, but it’s not a one-size-fits-all solution.
Consider a real-world scenario: developing an assay for a biomarker in neuron-derived exosomes from blood. This is a “dirty” sample, packed with proteins that could interfere. A generic BSA blocker probably won’t cut it. You might need to test various commercial blocking agents or even a solution of non-fat dry milk to effectively saturate the plate and prevent unwanted signal.
Your wash buffer is just as crucial. A standard buffer typically contains a mild detergent like 0.05% Tween-20 to help rinse away unbound reagents. Simply increasing the number of wash steps or adding a “soak time” between washes can dramatically slash background noise.
Finally, the substrate incubation time has to be carefully controlled. If you let the colorimetric reaction (with TMB, for example) run too long, you’ll overdevelop the signal in your high-concentration wells, making your standard curve impossible to read accurately. You’re looking for a development time that places your standard curve comfortably within the linear range of your plate reader.
This meticulous fine-tuning is what separates a good research tool from a clinical-grade product, especially when new technologies are involved. You can learn more about how generative AI is revolutionizing antibody design in our related article. This level of detail is a critical part of the elisa kit production workflow, ensuring that every kit you produce is both sensitive and highly reproducible.
Implementing Ironclad Quality Control and Lot Release
Once your assay is optimized, you pivot to what is arguably the most critical stage for any clinical diagnostic product: quality control. Let’s be blunt: an ELISA kit is worthless if it’s not consistent. A rigorous QC program isn’t just a box-ticking exercise; it’s the promise you make to every lab, clinician, and patient that the kit they open today will perform identically to the one they used last month and the one they’ll use next year.
This means building a systematic, documented process that validates every single production batch before it even thinks about leaving your facility. This final checkpoint is what guarantees your product is reliable, meets every performance claim you make, and stands up to the scrutiny of GLP and CLIA standards.
Establishing Core QC Assays
The bedrock of any solid lot release program is a panel of standardized QC assays that scrutinize the kit’s key performance characteristics. These tests have to be ruthlessly consistent, always run against pre-qualified reference standards and controls that you’ve characterized inside and out.
At a minimum, your QC protocol needs to nail down three critical parameters for every new lot:
- Precision: This is all about reproducibility. We typically measure it as the coefficient of variation (CV%). You need to assess both intra-assay precision (running the same sample multiple times on one plate) and inter-assay precision (running the same sample across multiple plates, often by different techs on different days). A common industry target is a CV below 15%.
- Sensitivity: This confirms your assay’s Lower Limit of Detection (LOD) and Lower Limit of Quantification (LLOQ). You have to prove, with data, that each new lot can reliably detect the low-concentration standards just as you’ve specified in the product insert.
- Specificity: You must show that the assay is still laser-focused on your target analyte. This usually involves “challenging” the assay with known cross-reactive substances to ensure you don’t get any significant signal interference.
To make sure your diagnostic ELISA kits are safe and reliable, it’s vital to build robust manufacturing quality management systems. These systems provide the structural backbone for all your QC and manufacturing work.
Before you can even lock down these QC parameters, you have to get through optimization. The decision tree below is a great visual guide for troubleshooting common issues during that phase, helping you figure out what to tweak based on your signal output.

This kind of logical troubleshooting saves a ton of time and reagents, streamlining the path to a robust assay ready for QC.
To provide a clearer picture of what this looks like in practice, here is a summary of standard QC parameters that are essential for the lot release of any clinical-grade ELISA kit.
Standard QC Parameters for ELISA Kit Lot Release
| QC Parameter | Acceptance Criteria (Example) | Purpose | Regulatory Relevance (GLP/CLIA) |
|---|---|---|---|
| Intra-Assay Precision | CV ≤ 15% for all controls | Ensures reproducibility within a single assay run. | Demonstrates reliability and consistency of a single test performance. |
| Inter-Assay Precision | CV ≤ 20% across multiple runs/days | Ensures consistency between different assay runs, operators, and days. | Critical for longitudinal studies and ensuring results are comparable over time. |
| Standard Curve Performance | R² value ≥ 0.99 | Verifies the linear relationship between concentration and signal. | Essential for accurate quantification; a core requirement for validated assays. |
| Sensitivity (LOD/LLOQ) | Must meet pre-defined concentration limits (e.g., LLOQ = 10 pg/mL) | Confirms the kit can reliably detect and quantify low levels of the analyte. | Defines the reportable range of the assay, a key validation parameter. |
| Specificity/Cross-Reactivity | < 1% signal with known interferents | Confirms the assay only detects the target analyte. | Prevents false positives and ensures diagnostic accuracy. |
| Spike and Recovery | 80-120% recovery in relevant matrix (e.g., serum) | Assesses for matrix effects that could inhibit or enhance the signal. | Validates assay performance in the intended biological sample type. |
This table represents the final exam for each production lot. Passing these checks is a non-negotiable step before any kit can be released for clinical use.
The Role of In-House Reference Standards
You can’t just buy commercial standards off the shelf and call it a day for lot release. Developing and qualifying your own in-house reference standards and controls is absolutely paramount. These materials need to be produced in a huge, homogenous batch and then characterized exhaustively to ensure they’ll be stable for years.
The best controls are those that mimic real patient samples. For example, you might create a large pool of human serum and spike in a precisely known quantity of your recombinant target antigen. These qualified reference materials become your internal “gold standard” for all future production runs.
Every new lot of coated plates, detection antibody, and standard must be tested against these established reference materials. This is how you bridge performance from Lot A to Lot B and beyond, creating an unbroken chain of quality.
Creating a Clear Certificate of Analysis
The Certificate of Analysis (CofA) is the official document that ships with every kit, summarizing the lot-specific QC results. Think of it as a transparent report card that gives your customers total confidence in the product they’ve just unboxed.
A well-structured CofA should clearly state:
- Product and Lot Information: Kit name, catalog number, lot number, and expiration date.
- QC Test Results: The actual data from your release testing, including standard curve parameters (like the R² value), intra- and inter-assay precision (CV%), and sensitivity (LOD/LLOQ).
- Acceptance Criteria: The pre-defined specifications the lot had to meet to pass QC (e.g., “Intra-Assay CV% <15%”).
- Approval Signature: Signed and dated by your Quality Assurance manager.
This document is so much more than paperwork; it’s a direct commitment to quality. This trust is what the entire ELISA market—valued at $2.70 billion in 2024 and projected to hit $4.72 billion by 2032—is built upon.
This level of stringent QC is especially critical for groups running clinical trials, where data integrity is everything. It’s why we apply these same principles to the services we provide through our clinical trial services.
Ensuring Stability and Navigating Regulatory Pathways

You can design the most sensitive ELISA in the world, but if the reagents degrade on a shelf before they ever reach a lab, the kit is a failure. It’s that simple.
Stability isn’t just a final check-box in elisa kit production; it’s a fundamental performance metric that defines your product’s shelf life, reliability, and ultimately, its commercial viability. This is where the meticulous work of assay science meets the hard realities of logistics, storage, and regulatory compliance.
Solid stability data is the bedrock of your kit’s expiration date. For any product heading toward clinical use under GLP or CLIA guidelines, it’s completely non-negotiable. Without it, you’re just guessing—and regulators don’t accept guesswork.
Designing Robust Stability Studies
To put a confident expiration date on your kit, you need to run two types of stability studies in parallel: accelerated and real-time. Think of them as a sprint and a marathon. Both are essential, and they tell you different things.
Accelerated stability studies are the sprint. Here, you store complete, packaged kits at elevated temperatures—typically 25°C, 37°C, and sometimes even a punishing 50°C—for several weeks. By testing the kit’s performance against its release specs at set intervals, you can quickly predict its long-term stability and pinpoint which components are the weakest links.
This process gives you a fast, predictive model. For instance, if a kit holds all its specifications for four weeks at 37°C, that data can often support a provisional one-year shelf life claim at 4°C while you wait for the long-term results to roll in.
Real-time stability studies are the marathon and the absolute source of truth. You must store multiple, independent production lots of your finished kit at the recommended temperature (usually 2-8°C) and test them against the full QC release panel at defined time points—like 3, 6, 12, 18, and 24 months. The official shelf life is the last time point where every single lot consistently meets every single specification.
Preserving Reagent Integrity with Lyophilization
Liquid reagents, especially sensitive antibodies and standards, are often the first to go. This makes shipping and long-term storage a huge headache. This is where lyophilization, or freeze-drying, becomes one of your most valuable tools. By removing water, you lock reagents into a stable, solid state that can dramatically extend their shelf life and even allow for room-temperature storage.
This strategy pays off in two major ways:
- Enhanced Stability: Freeze-dried components are far less prone to degradation, which can significantly push out your expiration date.
- Simplified Logistics: It often eliminates the need for expensive and complicated cold-chain shipping, making it far easier and cheaper to get your kits where they need to go.
Packaging and Documentation for the End-User
Your kit’s packaging is the first thing a customer touches. It sets the tone for their entire experience. It’s not just a box; it has to protect sensitive reagents from light, moisture, and the bumps and drops of shipping. To ensure product integrity from your facility to the lab, robust tamper-proof sealing solutions are critical.
The Instructions for Use (IFU) document is just as important. It needs to be crystal clear, concise, and impossible to misinterpret. A poorly written IFU is a recipe for user error, which leads to bad data and destroys customer trust in your product.
A great IFU must include:
- A Clear Kit Contents List: No ambiguity about what’s in the box and how much of it there is.
- Step-by-Step Protocol: Written in simple, active language that a first-time user can follow.
- Data Analysis Guide: A straightforward explanation of how to calculate results from the standard curve.
- Expected Performance Data: Your key QC specs, like sensitivity and precision, so users know what to expect.
In the end, it’s the combination of robust stability data, smart packaging, and clear documentation that turns a well-optimized assay into a trustworthy clinical product. These are the final, essential steps that bridge your R&D work with the demanding realities of the clinical world.
Scaling Your Production for Commercial Success
Moving an ELISA kit from the controlled world of R&D to full-scale commercial manufacturing is a huge leap. This is where your lab-bench science collides with the tough realities of logistics, supply chains, and market demand. Making this transition isn’t about inventing new science—it’s about mastering the art of process engineering and consistency at scale.
This stage isn’t just about making more of what you have. It’s about making it better, faster, and more reliably than ever before. Every manual step that was perfectly fine for a few dozen plates will become a crippling bottleneck when you need to produce thousands. Strategic planning around your supply chain, automation, and validation is what separates market leaders from companies that never get off the ground.
Fortifying Your Supply Chain
Before you even think about ramping up, you need an ironclad supply chain. Relying on a single vendor for a critical reagent, like your primary capture antibody or recombinant antigen, is just asking for trouble. What happens if their facility goes down or they discontinue a product line? Your entire production grinds to a halt.
To get ahead of this, you have to qualify at least one—and ideally two—backup suppliers for every single critical raw material. This isn’t just about finding another company selling a similar product. It’s a rigorous qualification process:
- Vendor Audits: You need to get in there and assess their quality management systems and manufacturing capabilities.
- Material Testing: Run full performance tests on their reagents to prove they perform identically to your primary supplier’s materials in your assay.
- Bridging Studies: Conduct formal studies to generate the hard data proving that materials from different suppliers yield equivalent results.
Think of this multi-sourcing strategy as your insurance policy. It gives you the flexibility to pivot without compromising the quality or availability of your elisa kit production pipeline.
A robust supply chain is invisible when it’s working and a catastrophic failure when it’s not. Investing time in qualifying secondary vendors isn’t a cost—it’s an essential risk-mitigation strategy for commercial scale-up.
Embracing Automation for Throughput and Precision
Manual pipetting and plate coating might work in R&D, but they’re completely unsustainable for commercial production. Human operators, no matter how skilled, are a source of variability. Automation is the only way to unlock both high throughput and unmatched consistency.
Bringing in automated systems for key production steps is a total game-changer. Here are a few high-impact areas to focus on:
- Liquid Handlers: These robots can dispense reagents, standards, and controls with incredible precision and speed, drastically cutting down on pipetting errors and operator-to-operator variability.
- Plate Coaters: Automated systems ensure every well on every plate gets a perfectly uniform coating of antigen or antibody. This is absolutely critical for minimizing plate-to-plate variation.
- Plate Washers: High-throughput washers guarantee that every wash step is performed identically—a crucial factor in reducing background noise and ensuring a clean signal.
This investment in automation quickly pays for itself by slashing labor costs, minimizing expensive batch failures from human error, and ensuring your final product is consistently top-notch.
Validating Your Scaled-Up Process
Once you’ve automated your key steps and secured your supply chain, you have to prove that your new, scaled-up manufacturing process actually works. This is where process validation comes in. The goal is simple: generate objective evidence that the process consistently produces kits that meet all of your pre-determined quality specifications.
This usually involves manufacturing three consecutive production-scale lots successfully. Each of these lots must pass your full QC release testing panel to demonstrate that the scaled-up process is under control and delivers a reliable product. This validation data becomes a cornerstone of your regulatory submissions and is essential for GLP and CLIA compliance.
Managing inventory and forecasting demand are also critical pieces of a successful scale-up. As you start supplying larger clinical trials or commercial partners, understanding global market dynamics becomes essential. For instance, China has emerged as the largest market for ELISA kits, capturing over a quarter of total global citations—a key indicator of product usage. While North America still leads in revenue, the momentum in Asia signals massive opportunities. For a company like NeuroDex Inc., this China-centric growth is a vital consideration for scaling production to support global biomarker discovery. You can explore more about these market share insights on citeab.com.
Common Questions in ELISA Kit Production
Taking an assay from the research bench to a validated, market-ready clinical kit is a journey filled with tough questions. The answers aren’t usually in a textbook; they come from experience, trial, and a whole lot of error. Here, we’ll tackle some of the most common—and critical—questions that teams run into during the complex process of ELISA kit production.
What Are the Biggest Hurdles When Commercializing an R&D ELISA?
The leap from a research-use-only (RUO) assay to a commercial diagnostic kit is less of a step and more of a chasm. In my experience, the three biggest hurdles that trip teams up are reproducibility, scalability, and documentation.
In an R&D lab, a little variation between reagent batches is often no big deal. For a commercial product, it’s a fatal flaw. This means you have to shift from flexible lab suppliers to vendors who can guarantee tight QC specifications and long-term availability for every single critical component.
Scalability is another monster entirely. A manual process that works perfectly for coating ten plates at a time becomes a logistical nightmare when you need to produce a thousand. This is where you have to invest in validating automated systems for plate coating, liquid handling, and washing. It’s the only way to eliminate human error and ensure every plate is uniform.
Finally, documentation under a formal Quality Management System (QMS) like GLP is a massive operational shift. Every reagent lot, every standard operating procedure (SOP), and every QC check must be meticulously recorded. It’s a demanding, bureaucratic change from the more fluid environment of a research lab, but it’s absolutely essential.
How Do You Confidently Determine an ELISA Kit Shelf Life?
Establishing an ELISA kit’s shelf life isn’t a guess—it’s a conclusion you draw from hard data generated through formal stability studies. This is a two-pronged process, involving both accelerated and real-time studies.
You always start with accelerated studies. This involves storing fully packaged kits at elevated temperatures, typically 37°C, and testing their performance against the original release specifications over several weeks. This gives you a predictive estimate pretty quickly and, more importantly, helps you identify the least stable components early on.
However, for regulatory and commercial purposes, the real-time study is the definitive test. You must store multiple, independent production lots at the recommended storage temperature (e.g., 4°C) and test their performance at set intervals—usually 3, 6, 12, 18, and 24 months.
The official shelf life is the last time point where the kit still meets all of its performance criteria. If a kit performs perfectly at 18 months but fails a key sensitivity spec at the 24-month mark, the shelf life is locked in at 18 months. There’s no room for interpretation here; the data dictates the expiration date.
What Are Matrix Effects and How Do You Handle Them?
Matrix effects are one of the most common and frustrating challenges you’ll face. They refer to the interference caused by various components within a biological sample—like serum, plasma, or CSF—that can artificially inflate or suppress your assay’s signal.
This interference can come from just about anything: lipids, endogenous antibodies, complement proteins, or other substances in a patient sample that disrupt the specific antigen-antibody binding your assay relies on. The result is inaccurate quantification, a critical failure for any diagnostic test.
The first step is always to test your assay with a diverse panel of individual donor samples to see just how bad the problem is.
To combat it, you have a few go-to strategies:
- Optimize Sample Dilution: Often, the simplest solution is the best. Diluting the sample can lower the concentration of interfering substances to a point where they no longer affect the assay, while your target analyte remains detectable.
- Develop a Specialized Assay Buffer: You can formulate a buffer containing blocking agents (like BSA or specific immunoglobulins) that are designed to neutralize common interferents and stabilize the reaction.
- Implement a Sample Pre-treatment Step: For particularly challenging matrices, you may need to add a pre-treatment step, like precipitation or filtration, to “clean up” the sample before it’s even added to the ELISA plate.
Successfully managing matrix effects is a hallmark of a robust, clinically reliable ELISA kit. It’s what ensures the results you generate reflect the true analyte concentration, not just noise from a complex biological sample.
At NeuroDex Inc, we navigate these complex challenges daily, developing validated, blood-based biomarkers for neurological diseases under stringent GLP and CLIA standards. Our expertise in isolating and analyzing neuron-derived exosomes allows us to build robust assays that accelerate drug development and bring actionable insights from the lab to patient care. Learn how our end-to-end clinical trial biomarker services can support your next breakthrough.
Generated with Outrank app


Leave a Reply